
If you thought travelling to Tenerife was all about just lying on a sunbed, think again!
Here’s the top 7 hikes to enjoy in Tenerife that will show you why this Spanish island is a great break for those who enjoy a more active kind of holiday too!
From hiking active volcanoes to trekking through biosphere cloud forests, it’s all on offer in this Canary island… and that’s without even mentioning the glorious coastal strolls and historic towns you can pass through too.
Honestly, for a slice of diversity that boasts the climate of North Africa and the facilities of the EU, it’s easy to see why Tenerife is becoming such a popular hiking destination.
If you’re tempted to see what all the fuss is about, then check out my list of the best Tenerife hikes here and my mini travel guide with all you need to know about trekking on this island at the end of the article…
Related Posts
- Where is Tenerife? + 10 Useful Island Facts
- 11 Best Things to Do in South Tenerife
- La Laguna, Tenerife: Full Travel Guide
My trip to Tenerife was sponsored by Visit Tenerife but, as always, all views are my own.
This page contains affiliate links meaning Big World Small Pockets may receive a small commission on any purchases at no extra cost to you.
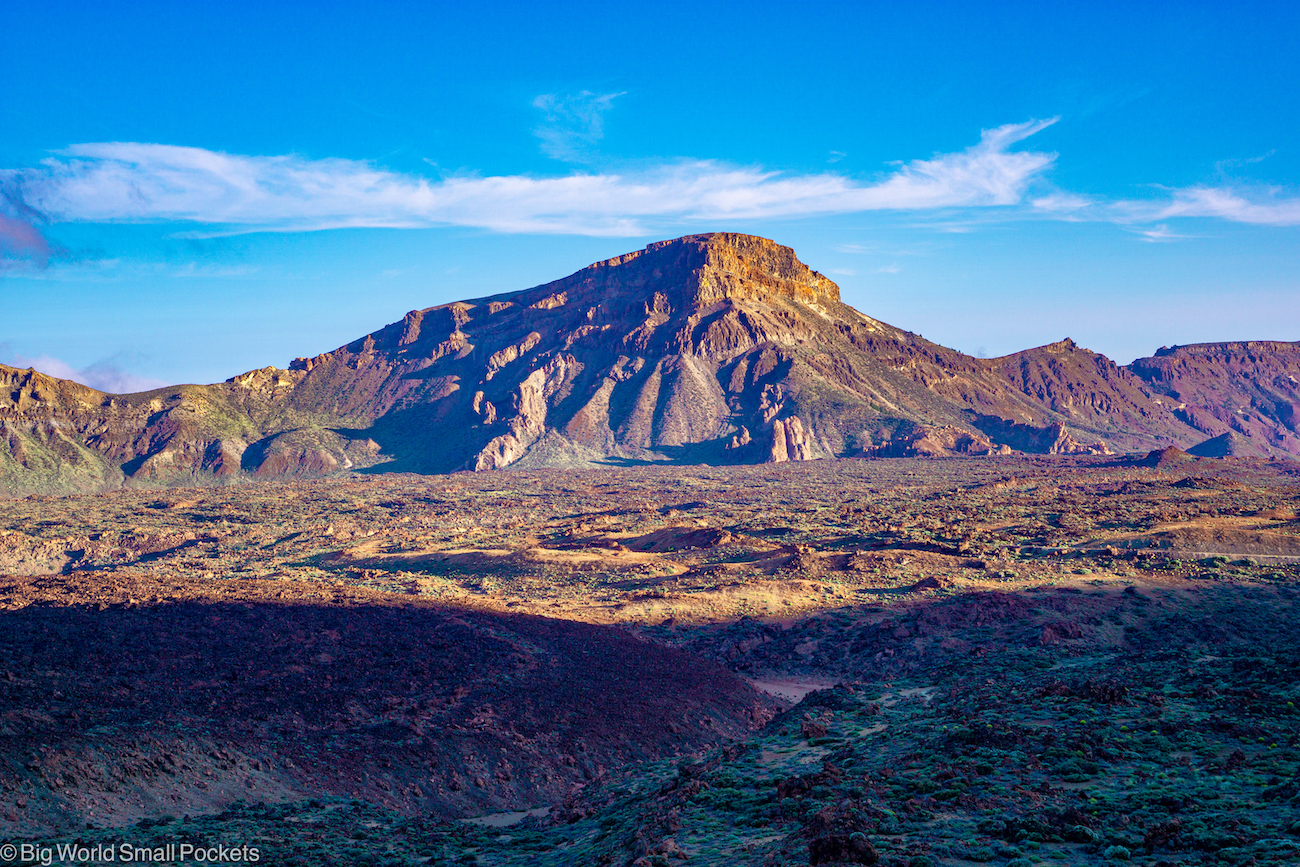
#1 Summit Mount Teide, Teide National Park
Trail Type: Linear
Distance: 8km
Duration: 3-6 hours
Gradient: Roughly 1350m
Bus Access: #348 or #342
Parking: Available at Montaña Blanca car park
There are so many hikes to choose from in Tenerife’s incredible Teide National Park, that’s pretty hard to pick the favs!
That said, who doesn’t love a classic?
So it’s in this vein that I’ve selected the summit of Mount Teide as number 1 on this list of top Tenerife hikes.
Predictable? Yes!
But still a freaking banger? Also yes!
Because let’s not forget Teide is technically classed as an active volcano and anyone who thinks scaling one of those isn’t a pretty cool adventure needs to get out more (or less!)
The good thing about summiting Teide is that the clouds in Tenerife normally hang about at around 2000m, which means if you get up to the summit of this giant, at a hefty 3715m no less, you’re going to be above the clouds and seeing, quite frankly, some seriously top notch viewage!
This is the highest mountain across the whole of Spain, and a UNESCO treasure, after all!
Anyway, I digress, the main point here is that there are 2 main ways to hike to the summit (or pico in Spanish) of Teide.
And these are either a) by day with a permit or b) by night without a permit.
Permits
Access to Teide’s summit is limited to 150 people per day to help preserve this national park.
Permits are required by anyone who will be at the summit after 9am.
The bad news is that you need to book this permit months in advance to secure one.
Yes, they are that hotly sought-after!
So, if you’re planning on hiking in Tenerife today, tomorrow or next week, you may be best to scoot down to some of the other good walking options on this hiking listicle!
The good news however is that the permit is free and is only required to access the last stretch of the hike – from where the cable car ends to the actual summit.
Read. there is a cable car you can take up Teide, but this doesn’t qualify as hiking, so won’t really be covered in this article!
The cable car is, however, a great open for families and operates from 9am to 5pm daily. Grab your tickets here.
You can also take tours that include a cable car ride and some hiking with a guide. Check out these great options if that’s of interest.
Otherwise, if you are still keen to hike to the summit of Teide, and have allowed yourself time to get a permit, you can sign up for one here.
Hiking at Night
If you are planning to hike to Teide’s summit overnight, so that you can view the sunrise before 9am and then leave, you do not need a permit!
To achieve a summit exit by 9am, you’ll need to hike Teide right through the night to reach the summit by dawn and then turn around before 9am and head back down the volcano.
The bad thing about this is the hiking at night, the good thing about this option is that it doesn’t require you to do any advance planning, which means you can assess whether you want to make the summit at the last minute based on the weather forecast!
You used to be able to take 2 days for the hike of Teide and spend the night in the Altavista Refuge on day 1, so you could get to the summit and down before 9am on the morning of day 2.
However Altavista Refuge is now closed for the foreseeable future, so this option is no longer available.
For hiking at night, you’ll need a really good headlamp and some stamina, but seeing sunrise from the summit and the Milky Way on the way up is epic!
Hiking by Day
If you do plan to hike to Teide’s summit in the day time, or leave the summit after 9am, then you will need a permit!
You can either hike the whole of the volcano, from the carpark, as you would at night, or take the cable car up to the top station and from there hike the remainder of the summit.
This is obviously a nice halfway option for many people and is accessible from 9am until 5pm in the winter or 7pm in the summer.
The cable car takes 10 mins to get to the top station and travels over a distance of 2.5km
Book your cable car tickets here or a cable car (+ hiking) tour here.
Teide Summit Route
The best option for hiking Mount Teide, whether at night or in the day, is to park at Montaña Blanca car park (situated at 2300m) and then allow between 3-6 hours to make the 8km trail to the summit via the Altavista Refuge.
This is the most popular route and the one I’d advise, especially at night, because the path is fairly clear.
That said, I’d still suggest downloading the trail route from either maps.me or AllTrails before you start the trek, so you have a reference point throughout.
Before the summit, you’ll pass the Altavista Refuge from where it’s then another 1-2 hours to the summit itself.
After passing the cable car station, you’ll have under 1km to go until the summit, but it’s steep and easily the toughest bit!
You also need to factor in the altitude here!
Remember after the top cable car station is the only part you need a permit for.
Things to Know Before You Go
Throughout this hike the path is clear, but do factor in altitude sickness and the weather, which can both act as major obstacles.
Learn more about altitude sickness here and be aware of the symptoms and effects in advance – people hiking Teide regularly succumb to it.
Forecast-wise, you definitely want to check the weather ahead of your hike up Teide to ensure you won’t get caught in any storms.
Also worth bearing in mind that even on clear, warm days, the temperature at the summit of Teide can be freezing, as in yes really, below zero.
You are up at over 3700m after all!
As such, pack accordingly with good trekking shoes and decent hiking socks, compressible down jacket, hat and gloves you can put on at the top, as well as suncream and a cap for keeping safe on the hike before the summit.
You will also need to bring all snacks with you, at least 2.5 litres of water and a good backpack to keep everything in.
Don’t forget wet wipes and your camera too!
It is not advised that people with cardiovascular or lung problems, pregnant women or children under 2 years old make the ascent of Teide, due to the health risks associated with the altitude.
If you simply want to enjoy an experience in Teide National Park (perhaps stargazing or lower scenic points via the comfort of a vehicle), check out these top options.
#2 Roque de Garcia Loop, Teide National Park
Trail Type: Circular
Distance: 3.5km
Duration: 1-2 hours
Gradient: Roughly 150m
Bus Access: #342 and #348
Parking: Available at Roques de Garcia car park
The other gem of a hike that I recommend in Teide National Park is the Roque de Garcia.
Located on the southeastern flank of the park, this trail begins and ends at Mirador de la Ruleta.
Parking is available at the nearby Roques de Garcia car park and there’s a bus stop close by here too.
Because it’s a circular loop, it’s easy to get back to your car or public transport at the end.
The star of the show on this Tenerife hike is the amazing rock formations that you can see as you walk.
The most iconic is Roque Cinchado, also known as Finger of God.
Once you escape the car park, there’s also very few other people around and you’ll be treated to epic views of Teide and the mountains surrounding the Caldera.
After about 500m-1km you’ll reach an information sign.
Here you want to take the left hand fork to continue the Roque de Garcia loop.
Branch right and you’ll head off on the Pico de Viejo trail, which is another top Tenerife hike, but harder and longer, so be warned!
#3 Benijo to Faro de Anaga Loop, Anaga Rural Park
Trail Type: Circular
Distance: 15km
Duration: 6 hours
Gradient: Roughly 1000m
Bus Access: #946
Parking: Limited availability in Benijo
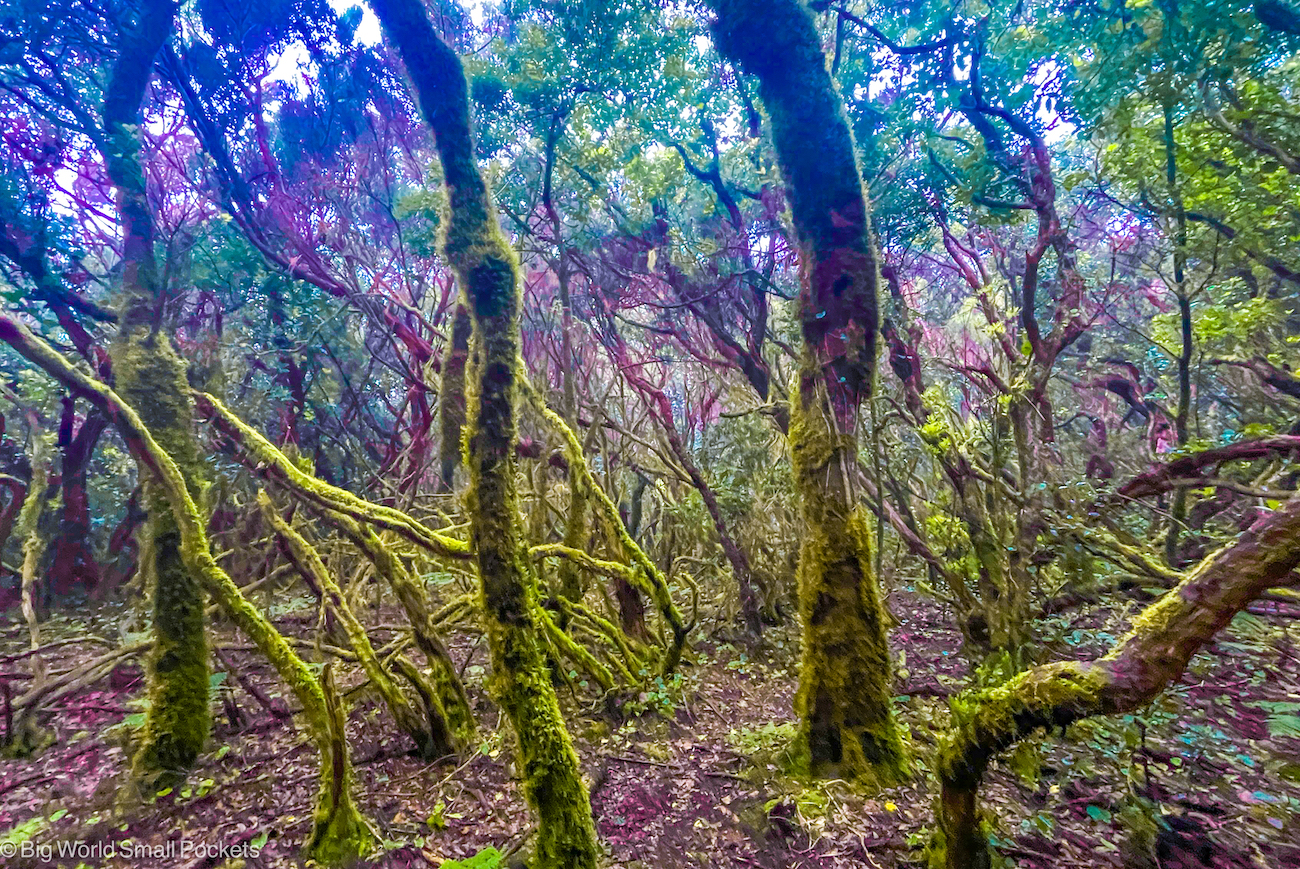
A challenging hike, this 15km loop is nevertheless incredibly rewarding thanks to the epic views you can enjoy of the coast and the lush greenery in the north of Tenerife.
One of the most popular trails in the Anaga Rural Park, you’ll start this one from the town of Benijo, on the western edge of the park, and from here, make your way along the coast to the beautiful lighthouse at the tip of the island – Faro de Anaga – via the town of El Draguillo.
The lighthouse, which was built in 1884 and is still operational, is essentially the halfway point of this hike and a good place to stop for snacks!
After it, you’ll endure the toughest part of the hike, as you ascend to some of Anaga’s lofty peaks before a steep descent back to Benijo via Chamorga.
A great loop hike, I definitely recommend starting this one early in the day, so you’re not trekking in the hot midday and afternoon sun.
Suncream, sunhat, snacks and plenty of water are absolutely required on this 6hr intense workout!
I’d also recommend good hiking shoes, given the steep ascent and descents on this trail.
Come prepared however and you can enjoy dramatic cliffs, crashing waves and of course epic views from the elevated lighthouse!
#4 Igueste to Atalaya de los Ingleses, Anaga Rural Park
Trail Type: Linear
Distance: 4km
Duration: 3 hours
Gradient: Roughly 500m
Bus Access: #945
Parking: Street parking available in Igueste along Calle Manuel Vera Álvarez
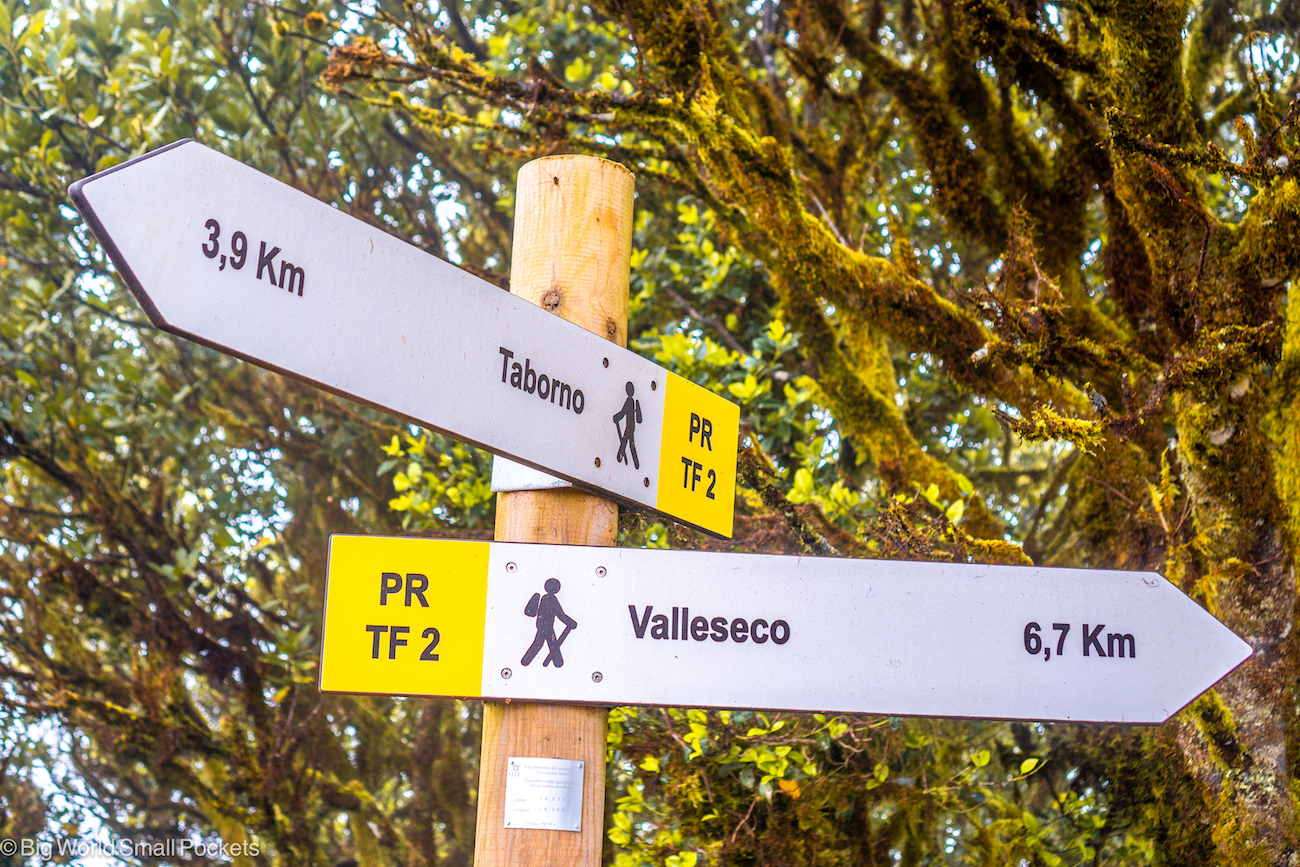
If you’re looking for an easier hike in Anaga Rural Park in the north of Tenerife than the Benijo to Faro de Anaga Loop, then the linear trial from Igueste to Atalaya de los Ingleses is the one!
At only 4km long, it’s a good half day option and follows a well-signed and easy-to-follow, clear path that takes you from the town of Igueste up to El Seamforo de Igueste.
There are some climbs however, so don’t expect a flat hike, but you’ll be rewarded with amazing views from this eastern part of the park and an encounter with Atalaya de los Ingleses – an abandoned stone shelter.
Begin from the church (Iglesia de San Pedro Apostol) in this whitewashed town, and then follow the signs for El Semaforo.
The white and yellow markers, denoting route PR – TF 5, will ensure you’re on the right trail.
For an extra add-on, take the smaller path going left, which you’ll see at a crossroads about 1km from the trail start.
At this crossroads there’s an El Semaforo trail sign pointing right, and a route to the left which is only marked with white, hand-painted arrows.
You essentially want to go for the left option, which is a narrower, more overgrown trail, but it will take you to the top of the mountain for views that are even better than at El Semaforo.
You can then head back, via El Semaforo, on your return journey to Igueste.
As with a lot of these top Tenerife hikes, there’s little shade on this trail, so make sure you bring sun protection and plenty of water!
#5 Barranco del Infierno, Adeje
Trail Type: Linear
Distance: 6.5km
Duration: 3 hours
Gradient: Roughly 500m
Bus Access: #417, #473, #447 or #460
Parking: Limited free street parking near the entrance
Located within Adeje, meaning it is easy to access from the south of Tenerife, Barranca del Infierno is set within a protected nature reserve, where daily entrances are capped to 300 people (20 people every half hour during opening times, which are 8:30am to 2:30pm daily).
This means you need to buy a permit to hike here, but it’s not expensive – around 11€ for a visiting adult and 5.50€ for kids.
Permits do need to be bought in advance however (a couple of days ahead should be fine), especially in high season because it gets booked out.
Grab your tickets for the Barranco del Infierno here.
Your entrance ticket will include a helmet, which you need to wear throughout the hike because, even though this is an easy trail and clearly marked, you’ll be walking in a gorge where rockfalls so occur.
You’ll also be given a quick safety briefing when you register at the entrance.
Suitable for children as well, because the trail is quite flat, near the start of the hike you get gorgeous coastal views on one side and dramatic cliffs on the other.
Make sure you take a moment to enjoy the Adeje Viewpoint here, because pretty soon you’ll enter the gorge, which has towering cliffs on either side.
The hike finishes at a pretty waterfall – although it often dries out in the summer, so do benchmark your expectations!
Barranca del Infierno translates as Hell’s Gorge in English, which gives you some idea of how striking this landscape is!
#6 Rambla de Castro, Los Realejos

Trail Type: Linear
Distance: 9.3km
Duration: 3 hours
Gradient: Roughly 380m
Bus Access: #363
Parking: Available at Restaurante Mirador de San Pedro, Maritim Hotel Tenerife or Calle Romantica I
Located in the north of Tenerife, this is a gorgeous coastal walk that offers amazing views.
You have the option to enjoy a more relaxed version by only heading one way, or go for the return journey for a more challenging hike.
If attempting the return journey too, you can either re-trace your steps along the coast, or make the return by diverting through Los Realejos, which is a cute town worth checking out.
The 2 ends of the trail are Playa Los Roques and Mirador de San Pedro and you can begin at whichever you fancy.
Close to Puerto de la Cruz, this trail has good public transport connections, with buses heading to both ends of the trail – great if you only decide to hike the route one way.
There’s also places to park at both ends of the trail.
Taking you through a protected farm area, filled with banana plantations and glorious lush countryside, this hike is also big on the palm trees and coastal views that are prevalent in this part of Tenerife.
There’s also the chance to hop down onto a black sand beach and enjoy a dip.
In general, the path is quite flat, but there are some climbs, so do bring suitable, sturdy footwear.
Shade can be limited on this track too – so plenty of water is a must.
Along the way don’t miss the highlights of San Fernando’s Fort, Elevador de Aqua de Gordejeula and Ermita de San Pedro Apostol, as well as some great beaches including Playa Fajana, Playa los Roques and Playa de Castro.
#7 Ruta del Agua Trail, La Caldera
Trail Type: Circular
Distance: 9km
Duration: 4 hours
Gradient: Roughly 500m
Bus Access: #345 and #346
Parking: Available
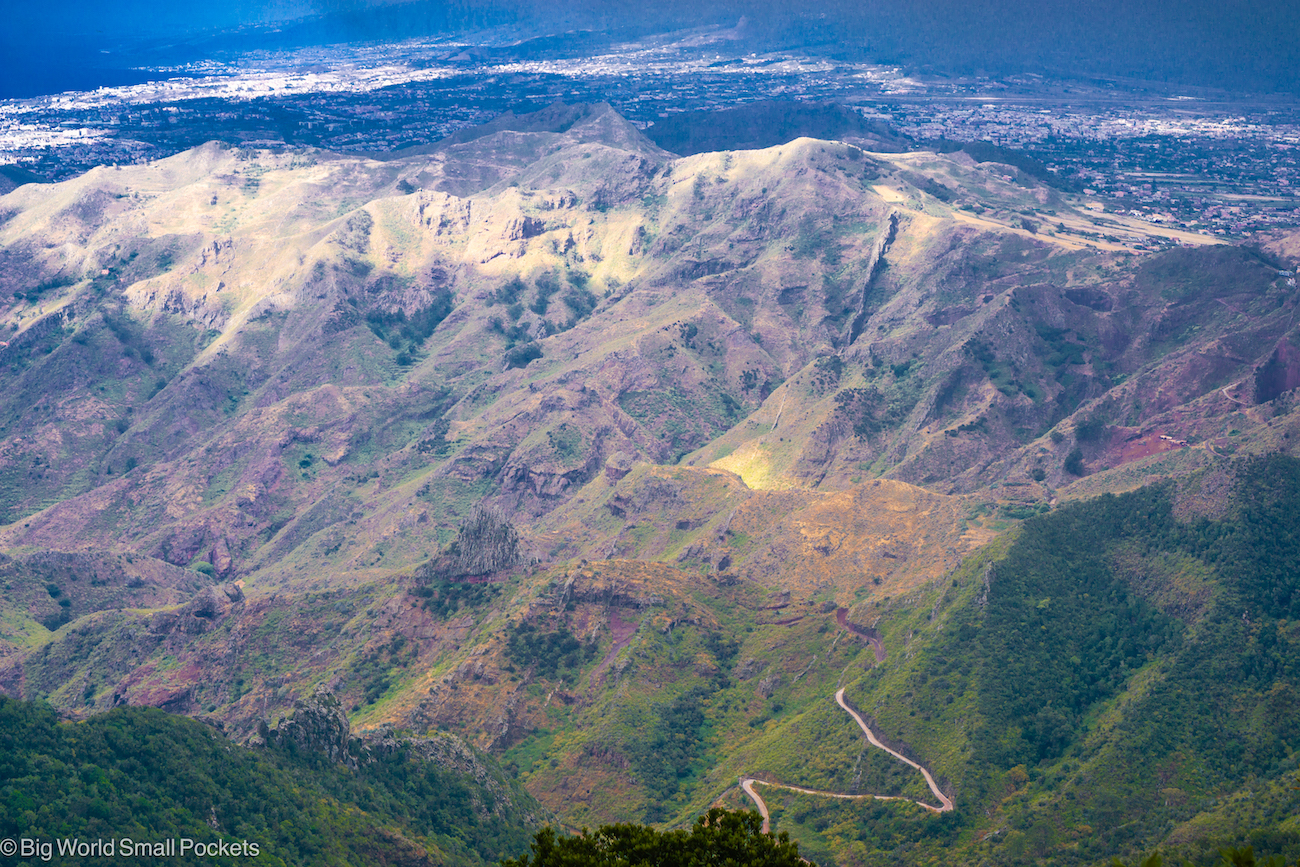
A good option from the town of Puerto de la Cruz, the Ruta del Agua trail is situated to the north of Teide and provides stunning views of this volcano, as well as the coast.
There’s several trail options in this little visited part of the island, making the best thing about them the lack of other tourists you’ll see.
My favourite however has to be the 8km hike called Ruta del Agua.
Taking around 4 hours to complete, this higher altitude option will have you trekking at around 1500m, which means can get a little fresh, so make sure you bring appropriate layers.
Moving you through a lovely, largely forested area, the trail ascents and descends roughly 400m, which means it’s not too steep and it’s accessible by public transport – win win!
Given it’s a circular route (largely), this trail is easy to catch buses #345 and #346 to and from (check timetables here) and there’s also parking at the trailhead for those with a car.
Mini Travel Guide to Hiking in Tenerife
Best Time?
The great thing about Tenerife is that it’s a year-round destination.
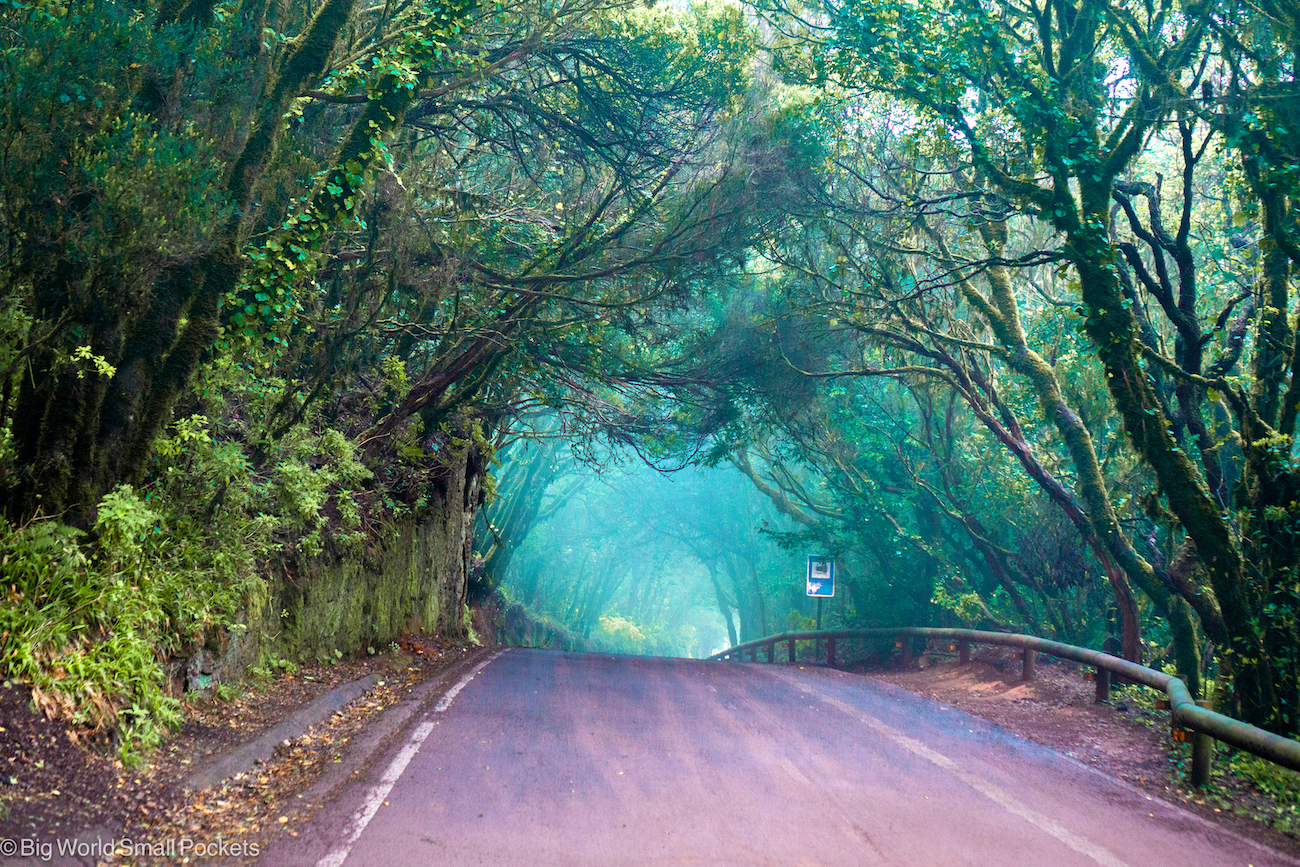
Situated off the coast of West Africa, yet politically part of Spain and Europe, Tenerife provides plentiful sunshine hours and good temperatures 12 months of the year, making it an excellent hiking destination – especially in the cooler, more elevated north of the island.
Summers in the south can be stinking hot here however, so the best time to visit is really October through May.
How to Get to Tenerife?
Tenerife Sur is the main airport on the island.
As always, I use Skyscanner to get the best flight prices, as they include budget airlines in their searches.
How to Get Around Tenerife?
From the airport to your accommodation, or for any of the hikes mentioned in this list, you can either drive or use the excellent bus network on the island.
Check out the Titsa Bus for more details about routes, journey planners and tickets for using public transport.
Otherwise, I always recommend DiscoverCars for rental vehicles in Tenerife.
Where to Stay in Tenerife?
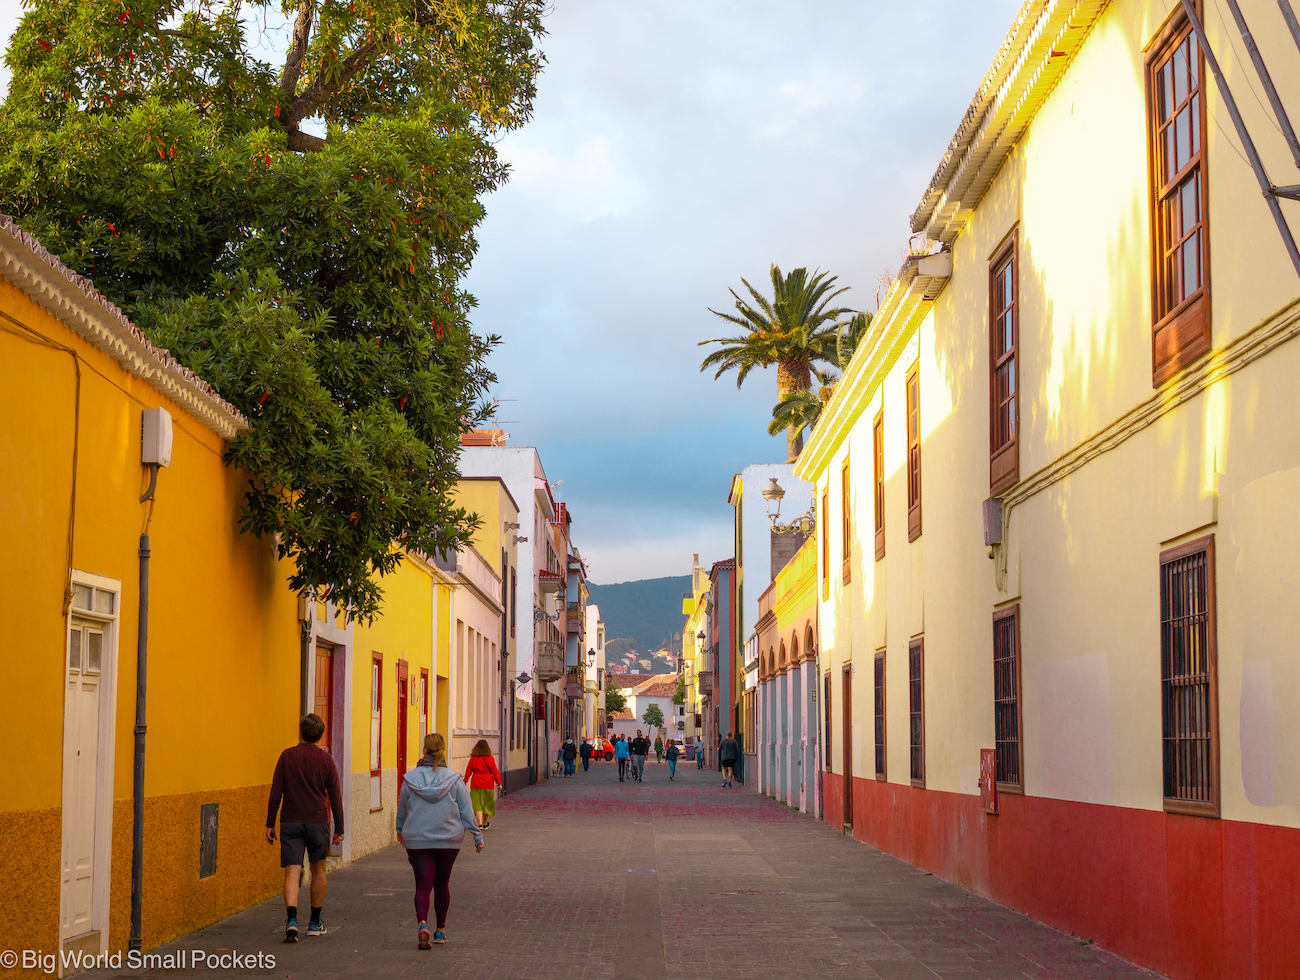
If you’re looking to stay in the cooler north of the island, closer to most of the hikes on this list, then I highly recommend the UNESCO city of La Laguna.
The former capital, it’s a beautiful historic spot and the comfortable Hotel Laguna Nivaria sits right in the heart of it.
Otherwise, if you prefer to base yourself in the sunnier, drier south of Tenerife, then Costa Adeje is my pick of the resorts.
The amazing GF Victoria Hotel there is worth the splurge!
Check out my review here or book your stay here.
Travel Insurance for Tenerife
World Nomads offers simple and flexible travel insurance. Buy at home or while travelling and claim online from anywhere in the world.![]()
Alternatively, if you’re a long-term traveller, digital nomad or frequent remote worker seeking travel health cover, check out Safetywing’s Nomad Insurance policies.
5 Key Packing Items for Tenerife Hiking
#1 Camera – Don’t miss snapping all the Tenerife hiking action across this beautiful island
#2 Osprey Day Pack – Ideal for carrying your sunscreen, towel, swimwear, phone, camera, snacks and water
#3 Sunglasses – Ensure you have UV protection to keep your eyes safe from the strong rays here
#4 Hiking Shoes – I love these North Face ones
#5 Large Water Bottle – Tenerife tap water is potable, so take a large refillable bottle to keep your plastic waste down and ensure you stay hydrated while hiking
Don’t forget to also take sunscreen and a protective hat, as well as good hiking socks.
Learn more in this complete Tenerife packing guide I wrote.
Travel Money for Tenerife
When it comes to paying for things in Tenerife, you want to ensure you’re not being charged overseas transaction fees or getting poor exchange rates when using your card abroad, which is why I always take my Wise card away with me wherever I travel.
The easy way to spend abroad with real exchange rates, no markups, no sneaky transaction fees and a free Euros account, you can use your Wise card just like a debit card across Spain and it links easily with Google and Apple pay. Grab yours here.
SAVE THIS ARTICLE TO PINTEREST!


And there you have it, my list of the top hikes to enjoy in Tenerife.
Have you attempted any of these trails?
Have any advice to share with other travellers?
Then please drop it into the comments box below!